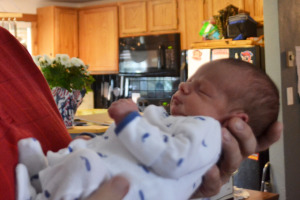
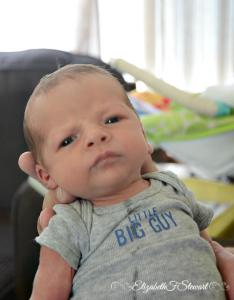
Last week, I got to meet my precious grand-nephew! He was born on Mother’s Day, five-weeks premature. In this picture, he was two and a half weeks so he was still pre-due date. He is very tiny but so perfect and healthy despite his early entrance into the world.
The weekend before he was born I traveled to the Portland area for a baby shower to celebrate his coming birth.
Prior to my trip, my niece had shared that the theme for his room would be antique/retro sports
so I took a trip to the fabric/craft store to see what I could find and inspiration as to what to create.
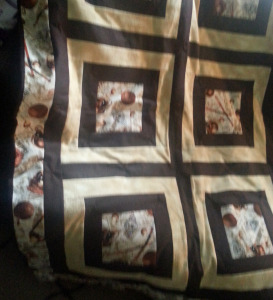
I found wonderful fabric with football, basketball, and baseball print that had a “historical” look.
It became the centerpieces for the squares in this quilt. This was only the second quilt
that I have pieced together. The first one was a photo quilt for my son’s 30th birthday.
Quilts with square blocks are relatively simple if you have basic sewing skills
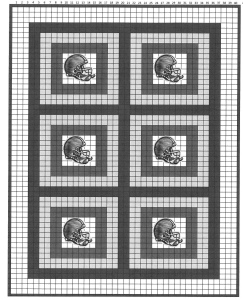
because you are only sewing straight seams. I charted the quilt on graph paper
so I knew what size to cut the blocks and strips (including seam allowances)
in order to get the size quilt that I wanted.
After I assembled the quilt top, I laid my quilt backing on the floor ( a quilting frame is on my wish list),
then laid the batting on top of that, adding the quilt top last. I made sure that the quilt top was centered
so there was extra batting that could be trimmed around the edges.
Someday I would like to make a quilt that is actually “quilted” but at my current skill level,
I “tie off” my quilts like I learned from my grandmother. I started at the middle of the quilt
and used safety pins to secure all layers together before I started to tie the quilt.
I used coordinating embroidery floss (it tends to stay tied better than yarn). I stitched and
a loop at the corners of each square and at 6-inch intervals on each of the joining strips and edges.
I trimmed the excess backing and batting, and pinned the seam binding on each of the edges.
I stitched the seam binding to the backing and I was done.
I wanted to add a gift for my niece as well. My dad, her grandpa, always loved to share stories
of his high school and college sports day, and so I thought you can’t get much more
retro or antique than the 1950’s.
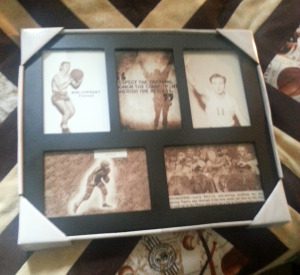
I purchased a frame that was matted to hold five photos.
I found a quote on Pinterest that could apply to both sports and growing as a Christ-follower,
and printed it in the size to fit one of the photo squares.
Then I went back through my dad’s yearbooks and found photos of him playing football and basketball.
I even had a yellowed newspaper clipping of him scoring a touchdown!
I scanned each of the items and edited them (using PSE 12) so they were all the cropped correctly
and tinted sepia to coordinate with the quilt. I printed these items to fit in the photo squares
and assembled the frame. It was a hit!
I’m thankful that I had a grandmother that patiently shared her quilting skills with me as a young girl
(and that she didn’t hesitate to make me rip out stitches and do it again so I learned to do it right!).
The time spent with her started me on a path of venturing out and
learning skills that can be used to decorate my home and bless others.
(Photo courtesy of Nehemiah’s Nana, Elizabeth Stewart.
She writes a wonderful blog Just Following Jesus.)
She writes a wonderful blog Just Following Jesus.)
Our family is celebrating the miracle that my sweet grand-nephew is,
and the health with which God has blessed him.
I’m glad I was able to create small gifts for them and
bless them with my heart for home!
