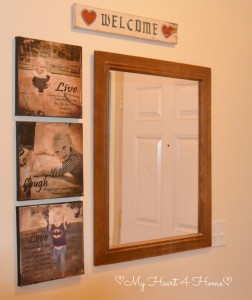
I have always liked the wood strip signs with the words “Live Laugh Love” painted or carved on them. I wanted to add those sentiments to my entry way but didn’t want to buy a sign.
The Christmas before our granddaughter was born, my husband got me a really nice digital camera and I have taken thousands of pictures over the last two years. Many of those pictures are of our granddaughter.
So bringing those two rather random thoughts together, I decided I wanted to use pictures of our granddaughter and verses of Scripture to convey those sentiments. The result were the canvases that now hang in my entry.
The canvases are not difficult but do take a bit of patience. The canvases are available in a variety of sizes at most craft stores. For this project I used 10-inch square white stretched canvases.
The first step is to select the photos and use photo-editing software to get the best rendering of your photo including cropping it to get only the images that you want. (I use Adobe Photoshop Elements 12.) I used the “vignette” effect to darken the corners of my photos. I used the “Type Tool” to add the words and Scripture verses to each photo.
The next step is to reverse the images in your editing software so that when you apply the photos to the canvases they will not be backwards.
The pictures need to be printed on a color laser printer (in my experience, ink jet printers do not work for this project). If you don’t have a color laser printer, you can take your portable thumb drive to an office supply store like Staples to have them printed.
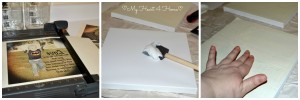
I printed mine on 11×17 white copy paper to accommodate the 10-inch square pictures, and trimmed the reverse-image photos to fit the canvases.
I worked with one canvas at a time for adhering the photos. I spread an even thin layer of Liquitex Matte Gel on the canvas, and then lay a photo face down on the canvas gently adjusting to make it square. Starting in the middle, I gently pressed the image into contact with the canvas and spread my touch towards the edges of the canvas to work out any air bubbles or wrinkles.
Now is where the patience comes in!
The canvases have to be allowed to dry completely without being disturbed. The paper tends to “stretch” as it absorbs the Liquitex and will look wrinkled until it dries completely. If you try to smooth it when it wet, you risk making the wrinkles permanent in your picture. Once it is dried completely, you can move on to the next step. When it is completely dry, you should not be able to see the image through the paper.

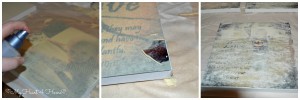
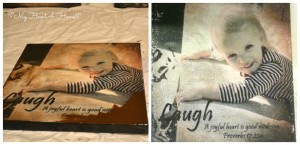
The next step requires a squirt bottle of water and more patience. Spray the canvas with water and gently begin to rub the paper off of the canvas. You need to rub hard enough to remove the paper but not so hard that you also rub the photo off of the canvas. If a few places get rubbed down to bare canvas, it will add to the “antique” feel of the finished product. You just want to make sure that most of the photo remains on the canvas. The photo on the right shows what it looked like after the first rubbing. It took me two or three times of spraying, rubbing, letting it dry, then spraying and rubbing again to get most of the paper off of the photos.
After the canvases dried again, I painted the edges with black acrylic paint using a sponge brush. When the paint was dry, I covered the entire canvas including edges with a thin coat of Matte Modge Podge.
To add to the vintage feel of my finished canvases, I chose to crackle and antique them. I used 2-Step DecoArt Perfect Crackle. Step 1 is applied to the canvases and allowed to dry thoroughly. I wanted tiny crackles like on antique porcelain so I applied one thin coat. After it dried, Step 2 was applied. As it dries the crackles will begin to happen in the surface. To make the crackles more evident, I used FolkArt Antiquing Medium in Espresso. I applied it in the corners of the canvases and used a soft cloth to rub it toward the center of the canvases. I was very careful to use minimal antiquing on the faces in the images. (Hopefully you can see the crackling in the photo on the right.)
After the canvases are completely dry, I use a spray sealer to finish them and add a protective coating.
After I made the set for my entry way, my youngest son asked for a set so the ones below are the second set that I made.
Using photos that I have taken to decorate my rooms allows me to share my heart for home (and family) with all who visit.
I hope you will try this project to share what your heart loves and, please, I would love to hear how your projects turn out.


